The lucky chestnut, Pachira aquatica, which originally comes from Mexico and belongs to the mallow family, grows tree-like and impresses with its oval, thick leaves. The trunk is often braided for decorative purposes, but this makes the plant as a whole vulnerable to diseases. Overall, however, the lucky chestnut is very robust, which is quite forgiving of minor care mistakes and is therefore suitable for every hobby gardener.
Table of Contents
Location, temperature and soil conditions
The lucky chestnut originally comes from Mexico. – So, it’s no wonder that the plant is used to the sun and prefers a correspondingly warm location, which does not necessarily have to be full sun; a place in partial shade is completely sufficient. In summer the plant can be kept outdoors. However, the location should be sheltered from the wind and also protect from rain. That is why balconies and covered areas in the garden are particularly suitable for keeping in summer. The lucky chestnut gets by here throughout the summer with temperatures between 12 and 24 ° C. However, caution must be exercised if the relocation takes place outdoors in summer; it is best to get the plant used to the new conditions very gradually. Due to the missing window pane, the lucky chestnut is now exposed to the sun unfiltered. The new conditions can quickly lead to burns.
During the winter months, the lucky chestnut prefers a sunny to partially shaded location in the apartment. If the plant is not directly behind the window, it can even withstand the summer midday sun. If you also pay attention to enough brightness, the plant will grow particularly well. Even in winter, the temperature should be between 12 and 25 ° C. The plant can only withstand temperatures below 10 ° C for a short time. In addition to the site conditions, the right choice of substrate also ensures that the plant thrives:
- The soil should be humus.
- The richness of nutrients is of particular importance when choosing the substrate.
- In addition, the substrate should be as loose as possible; for this purpose, conventional soils can be loosened with sand.
- Basically, cactus soil or potting soil are suitable.
The following rule of thumb applies when choosing the substrate: If there is no pouring over, conventional flower or cactus soil, or even potted plant soil, can be used. If, however, it happens frequently that too much water is given during watering, these substrates are best mixed with clay granules or pumice gravel. The optimal ratio here is 1: 1.
Watering, fertilizing and wintering.
During the summer months – between April and September – that the plant spends outdoors, there is moderate watering. For this purpose, the lucky chestnut is supplied with water once a week; After watering, the ball sucks itself full of the liquid and stores the water. It should be poured until the substrate no longer absorbs moisture. After waiting a few minutes, the plant’s saucer is freed from excess water in order to avoid waterlogging. If the water is not removed, there is a risk of root rot. After watering, the substrate is allowed to dry out well before the next watering. In winter the plant is only sparsely supplied with water. The lucky chestnut is only watered in sips and otherwise kept moist with the help of regularly sprayed water, to ensure protection from dry heating air. Targeted fertilization is also recommended so that the plant thrives:
- The fertilization takes place in the period between spring and autumn.
- The plant is supplied with half the concentration of a green plant fertilizer once a month.
- Alternatively, special fertilizer sticks can also be used.
- There is no fertilization during the winter months.
- The plant is also not fertilized in the first year.
After the plant has spent the summer outdoors, it is kept indoors during the winter months. The lucky chestnut feels particularly at home here in a light and warm location.
Care of the lucky chestnut
If the lucky chestnut is well cared for and watered moderately, but not excessively, the plant otherwise requires little care. Fertilization can also be dispensed with if the plant has the opportunity to thrive in an ideal location and under favorable soil conditions. However, in some cases it may be necessary to cut the lucky chestnut as well. Targeted pruning has proven particularly useful when growth is very rapid. The best time to prune the lucky chestnut is spring; a few weeks later the new shoots appear. The weeks in spring are also an ideal time to repot the plant if necessary.
This is how reproduction works.
The lucky chestnut is propagated either via seeds or cuttings; Cuttings can either be grown in a water glass or planted directly in the ground. Propagation via cuttings in potting soil is not laborious:
- Woody or green shoots are suitable for propagation.
- The shoots are separated from the plant with a sharp kitchen knife.
- After the cut, the parts of the plant can be planted directly in the flower pot.
- Patience is now required: it can take a few weeks for the roots to develop.
Alternatively, the plant can be propagated using cuttings in a water glass. To do this, green or lignified shoots are cut off from the plant. Then the cuttings are placed in a glass filled with water; the stem should protrude at least 2cm deep into the water so that the cutting is optimally supplied. The optimal temperature for rooting the lucky chestnut is between 20 and 25 ° C. The water glass should be kept in a bright location, but one that does not allow direct sunlight. When the shoots have drawn enough roots, the plant can be repotted. However, moving them to a pot filled with potting soil should be done very carefully, as the thin roots break very easily.In addition to propagation via cuttings, the lucky chestnut can also be grown with the help of seeds. The best time for sowing is spring. First, the substrate is prepared, which consists of nutrient-rich potting soil, which is additionally loosened with gravel or sand. The seeds grow best if they have been pretreated; To do this, the plant seeds are first soaked in lukewarm water. The soaking time can be a few hours. Then the seeds are placed about one centimeter deep in the prepared substrate and poured vigorously. The planter should be kept in a bright place that is always around 22-24 ° C. The lucky chestnut thrives best at these temperatures. So that the plant can develop optimally from the seed, the soil must always be kept well moist. However, the substrate must never be wet! Once the roots have taken root and the lucky chestnut has gradually developed, it only needs to be watered once a week.
Pests and diseases

For decorative reasons, the lucky chestnut is often offered in the trade in the form of a braided trunk. However, this variant has a decisive disadvantage: the plant is less robust and more susceptible to diseases and pests, as the bark is correspondingly thinner. For this reason, it has proven useful to separate the loosely joined trunks. This is usually particularly easy to do directly after purchasing the plant. The shoots of braided lucky chestnuts should be separated early. The individual shoots are then planted in such a way that they do not obstruct each other or are placed in extra flower pots. Variants of the lucky chestnut that have been braided into a standard stem are particularly susceptible to this. Better not to buy these.
Leaf shedding is one of the typical symptoms that the plant shows in the event of illness. If the plant sheds a few leaves only occasionally and in the lower areas, the rhythm is normal; usually there is then no disease. However, if the shedding becomes stronger, the cause should be specifically searched for:
- First of all, it should be checked whether the lighting conditions are optimal.
- The cold can also be a reason for leaf shedding; then the plant must be moved to a warmer location.
- The plant sometimes also reacts to frequent changes of location by shedding leaves.
- Is the irrigation optimal? Waterlogging can also cause the plant to lose leaves.
If the lucky chestnut falls ill due to waterlogging, targeted repotting is necessary in many cases. The roots should be examined for decaying parts, which are then separated. If the lucky chestnut shows yellow leaves, insufficient humidity may be the cause. Then special humidifiers, which are set up near the plant, help. Alternatively, the leaves can also be sprayed with water; at the same time the plant is freed of dust. However, treatment is not always necessary if the leaves of the lucky chestnut develop water that drips from the tip of the leaf. The plant often sweats in warm, humid weather; this does not require treatment. However, if sweating persists, the cause may be a substrate that is too moist. Furthermore, the lucky chestnut can also suffer from mold infestation, which manifests itself in a gray-white coating on the earth and is also triggered by a substrate that is too moist. Then the top layers of earth have to be removed and the substrate dried well. Last but not least, lucky chestnuts are often attacked by aphids. Then the leaves are covered in a sticky liquid. There are various options for combating the pests: Then the leaves are covered in a sticky liquid. There are various options for combating the pests: Then the leaves are covered in a sticky liquid. There are various options for combating the pests:
- A targeted jet of water is often enough to combat the pests.
- Soft soap solution also helps with aphid infestation.
- Beneficial insects can also be used; Ladybugs are particularly suitable.
- In the case of severe infestation, plant sticks that are stuck into the earth have proven to be useful.
Naming and distribution of the plant
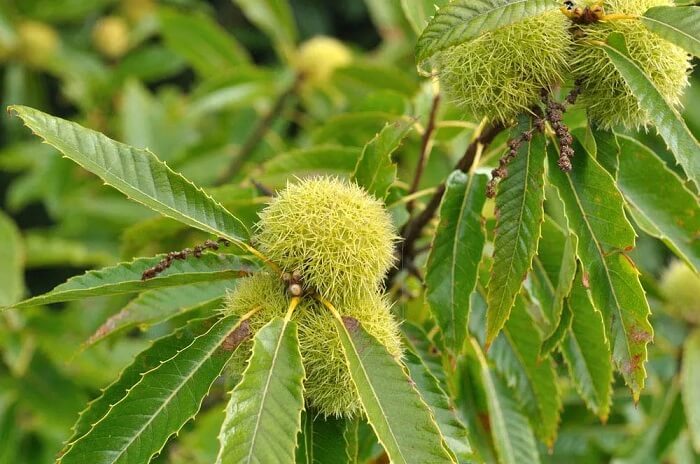
The lucky chestnut gets its name because of the special shape and structure of its leaves, which are very similar to chestnut leaves. In Taiwan, the plant is also considered a good luck charm that ensures luck and prosperity. Originally native to Central America – from Costa Rica to Mexico – the plant is mostly cultivated as an ornamental plant in frost-prone areas.
Conclusion
The lucky chestnut is considered to be robust and resilient, which can be propagated very easily and only requires moderate care overall. However, this is especially true for specimens that are kept with a natural trunk. By weaving the trunks together, the plant becomes more susceptible to diseases and pests. Even unfavorable site conditions can then be tolerated more poorly. Therefore, beginners in particular should always prefer non-braided specimens.